-
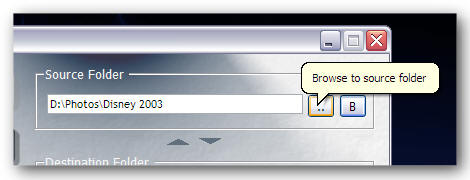
Select the source folder
First you must select the folder which
contains the images you would like to be
displayed in the gallery, or the images
you would like to process into
thumbnails. Click the button shown to
'Browse to the source folder'.
-
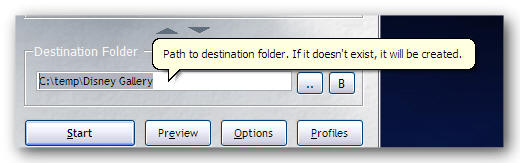
Select the destination folder
Next, you must select where you would
like to place the generated files.
Either type in the box indicated, or
click the button to browse to a
location. Notice the addition of the
'New Folder' button on the dialog box.
This will help you to create a new
folder. We recommend you create a new
destination folder for each project to
reduce confusion.
-
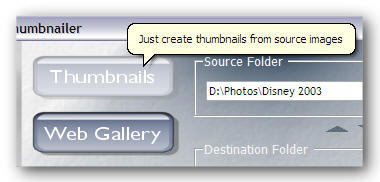
Select the process type
Click on one of the two big buttons. If
you want to create a web gallery (as we
do in this tutorial), click the 'Web
Gallery' button. It will become
highlighted as shown below.
You can use one of the predefined
Profiles to get you started. Click the
'Profiles' button and select a profile,
then click the 'Load Profile' button.
If click the 'Set as default' button,
the current profile settings will be
saved to the 'Default' profile and
loaded automatically every time you
start MD2 Thumbnailer.
-
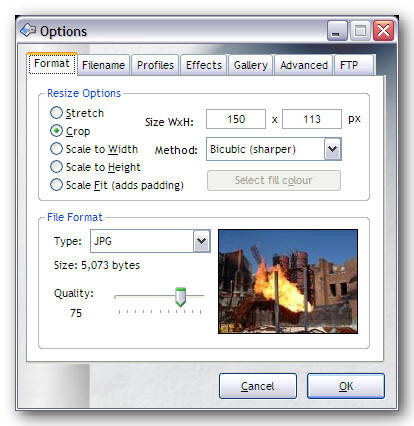
Choose the format of
your thumbnails
Click the 'Options' button and you will
see the dialog below. Here you can
choose the Resize options and file
format for your thumbnails. We recommend
'Crop' resize as then the thumbnails
will all be of uniform size and both
your width and height requirements will
be met. The file format is probably best
set to JPEG and the quality set to
between 75 and 90.
-
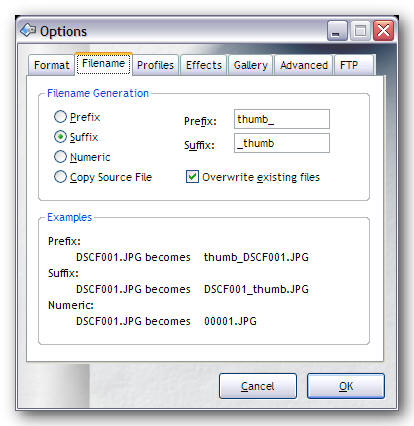
Choose the filename
renaming style
If you are just resizing some pictures
using the 'Thumbnails' process, then you
will probably want to use the 'Copy
Source File' option as this will mean
that your thumbnails will have the same
filename as the source files. If
the 'Overwrite existing files' option is
not set, an image file will not be
overwritten and will instead have a
number appended to it.
-
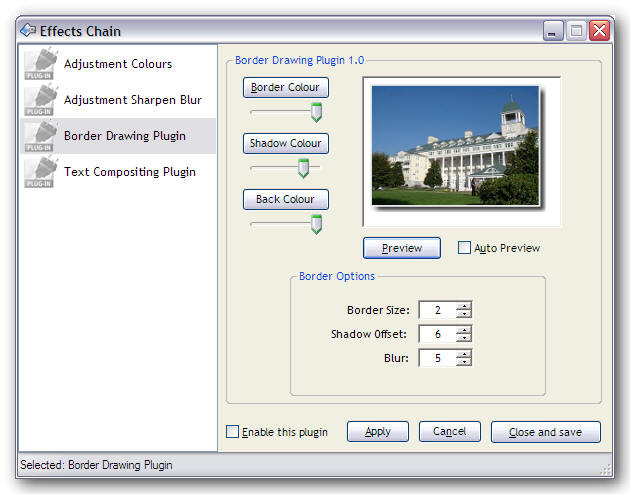
Configure the effects
plug-ins
Now click the 'Effects' tab on the
options dialog and then the 'Configure
Effects' button. You can now see the
effects chain. On the left is the list
of available effects plug-ins with the
plug-in that will be applied first, at
the top of the list. You can drag and
drop these plug-ins to choose the order
in which they are applied. It is
recommended that the 'Adjustment'
plug-ins are applied before the other
plug-ins because otherwise they will
effect the drop shadows, borders and
text as well as the original image.
You must enable a plug-in for it to be
applied to you thumbnails. You can do
this by clicking it, configuring the
options, checking the 'Enable this
plug-in' check box at the bottom of the
dialog, and then clicking the 'Apply'
button. You must click the 'Apply'
button to save the settings if you
change them.
When you have finished configuring your
effects chain, click the 'Save and
Close' button to exit the effects chain
configuration dialog.
-
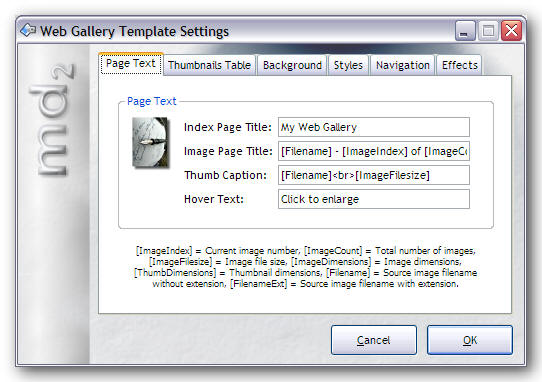
Configure the gallery
options
Finally, you can configure the 'Gallery'
options. Click the 'Configure Gallery
Text' button on the 'Gallery' options
tab. Here you can set the text for your
gallery web pages including the use of
the predefined macro variables shown at
the bottom of the dialog. These ate
values specific to each page or image
that can be added to each page when they
are generated.
Note: You can use the 'Rename
Image' button in the EXIF viewer
to properly caption your images for the
web gallery.
Please configure the other gallery
options as you see fit. The mouse hover
effects are really cool!
-
You're ready to go!
Click OK and then OK again to return to
the main screen. You can now click the
'Start' button to set the wheels in
motion. The progress bar will show you
the current progress of the generation.
MD2 Thumbnailer is one of the
fastest applications of its out there.
Sit back and relax.
If the options are set, MD2 Thumbnailer
will automatically upload your gallery
for you, or present you with the
generated files. If you would like to
add shadows and process the main gallery
images, remember to set the 'Process
gallery images' and the 'Apply
plugins to gallery images' check
boxes on the 'Gallery' options
tab.
Thank you for using MD2 Thumbnailer!
|